Program features
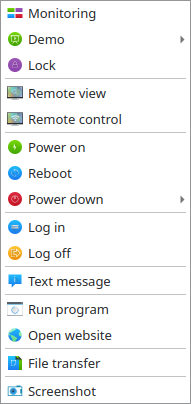
Veyon offers a variety of features that let you control and access computers. All available features are accessible through the buttons in the toolbar as well as the context menu of individual computers.
If you move the mouse over the individual buttons in the toolbar, a tooltip with a short help text is displayed unless you have disabled tooltips. Pressing a button activates the desired feature on all displayed computers.
Using functions on individual computers
If you only want to activate a function on a single computer, right-click the computer in the monitor view and select the desired function from the context menu. The entries in the context menu are displayed dynamically depending on the active functions.
You can also select multiple computers in the monitor view by drawing a selection rectangle with the mouse that includes all desired computers:
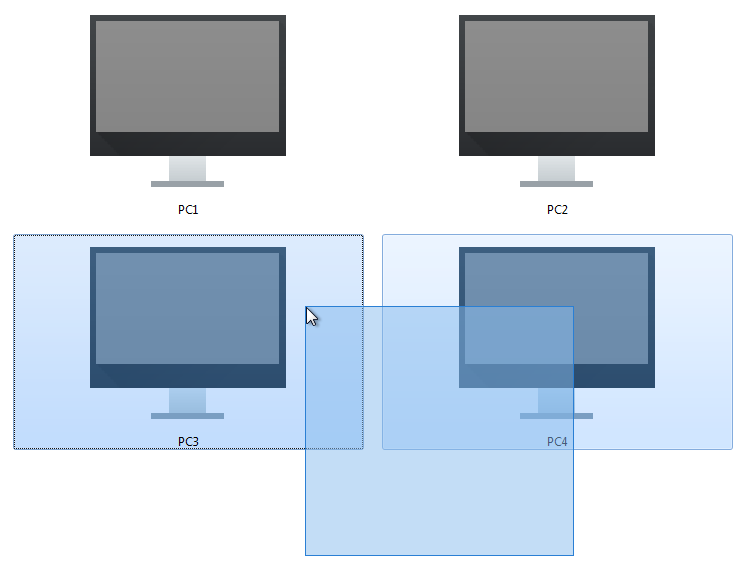
Alternatively, you can press the Ctrl key and add computers individually to the selection via mouse click.
Monitoring mode
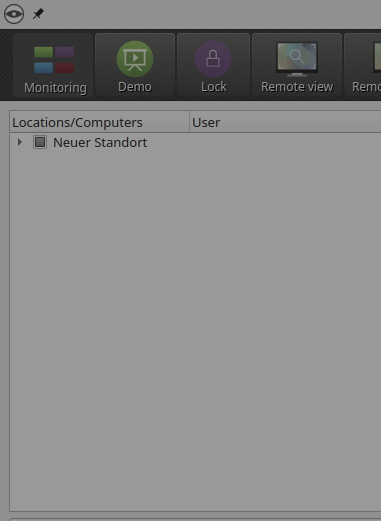
By default Veyon is running in monitoring mode. In this mode you have an overview of all computers and see their screen contents in thumbnails. The screen content is updated almost in real time, so you can monitor all activity at the selected locations.
As long as there is no connection to a computer, a computer icon is displayed instead of the screen content. After the program has been started, the icon is initially colored gray. As soon as the program detects that the computer is unreachable or access is denied, the icon changes accordingly and a status message is shown in the tooltip of the computer.
Some of the features described in the next sections switch the remote computers to a different mode. You can exit the respective mode by activating monitoring mode again.

Demonstration mode
You can use the demonstration mode (demo mode) to start a presentation. In this mode, the content of your or a student’s screen is broadcasted to all computers and displayed in real time. You can choose between a full screen and a window demo.
During a full screen demo your screen content will be displayed in full screen on the remote computers. Logged-in users cannot use their computers for other tasks in this mode because all input devices are locked. In this way you will gain the full attention of your students.
By contrast, a window demo allows users to switch between the demo window and their own applications. For example, course participants can arrange the windows side by side and try out the demonstrated steps themselves in parallel. The input devices are therefore not locked in this mode.
In order to start a demonstration, you have to open the demo menu by pressing the Demo:

Now click the desired item in the menu. If you want to share a student’s screen, make sure to select it before so the program knows which screen to broadcast.
In case your computer is equipped with multiple screens, you can choose to only broadcast one of the screens. To do this, click the corresponding screen item in the demo menu before sharing your screen.
If you want to leave the demonstration mode again, simply press the button again or click on the Monitoring button to switch back to monitoring mode globally. The context menu can also be used to stop the demonstration mode on individual computers.
Lock screens
Another way to draw students’ attention is to use the screen lock feature. As during a full-screen demonstration, all input devices on the students’ computers are locked. The computers can then no longer be used by the students. In addition, a lock symbol is displayed to prevent distractions caused by open applications.
Press the Lock button to lock all displayed computers:

If you want to unlock the screens, simply press the button again or click the Monitoring button to switch back to monitoring mode globally.
If only individual computers are to be locked, you can select them as described in section Using functions on individual computers and select the screen lock feature in the context menu. The screen lock can then be deactivated either by selecting Unlock or switching back to Monitoring mode. The screen lock can also be activated globally at first and later deactivated for individual computers via the context menu.
Note
Due to security restrictions of most operating systems, the lock screen can not be displayed if no user is logged on. The input devices are still locked, so that no user logon is possible.
Remote access
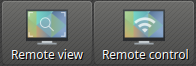
The feature group remote access consists of two very similar features Remote view and Remote control. In both access modes, the screen of a remote computer is displayed in full size in a separate window. In contrast to the monitoring mode in the main window, you can watch the activities on a computer in detail or intervene yourself.
The features can be activated in different ways. Depending on the system configuration, one of the two features is usually started by double-clicking on a computer. Alternatively, you can click the right mouse button to open the context menu and select the desired feature.
If you want to access a computer that does not appear in the monitor view, use the corresponding toolbar button:
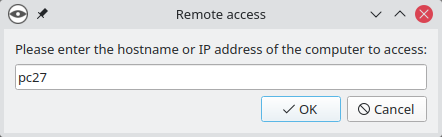
After pressing this button, a dialog is opened and asks for the hostname of the computer to access:
Afterwards a new window opens with the remote access view:
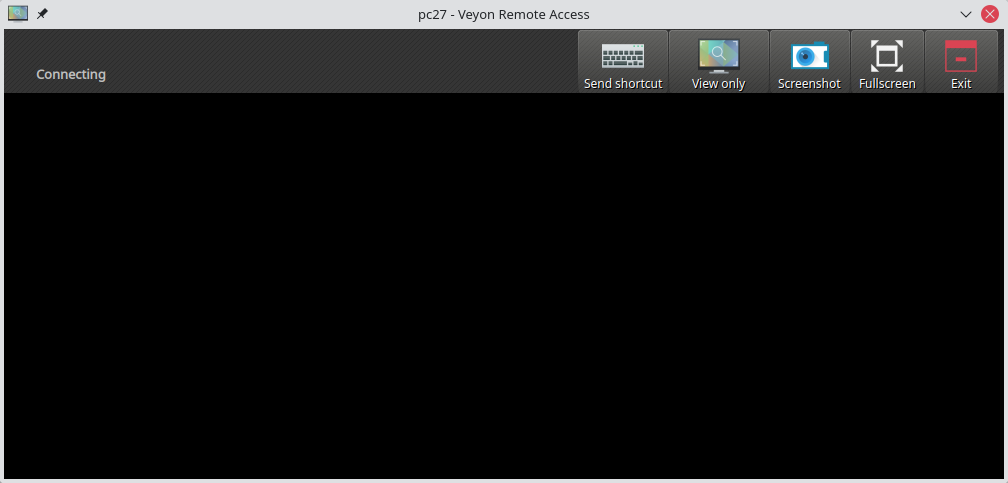
The remote screen is then displayed within a few seconds and updated in real time. At the top of the window you will see a toolbar with buttons similar to the main application. The toolbar disappears automatically a few seconds after the connection is established. You can show it again at any time by moving the mouse pointer to the top of the screen.
You can also change the access mode at any time during a running remote access session. All you need to do is click on the Remote control or View only button. The button does not show the current access mode, but the access mode that is changed when pressed.
As soon as you have entered the Remote control mode, your keystrokes, mouse movements and clicks are transmitted to the remote computer so that you can operate it as usual. However, depending on the operating system, certain special keys or key shortcuts such as Ctrl+Alt+Del cannot be used directly. If you want to use these shortcuts, you can use the button Send shortcut. Clicking this button opens a menu where you can select the desired shortcut:
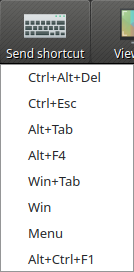
If the menu was opened accidentally, it can also be closed again without triggering an action by clicking the button again or pressing the Esc key.
If you want to switch to fullscreen mode, you can use the Fullscreen button. In full screen mode, the button label changes to Window. You can easily switch back to window mode by clicking on it again.
The Screenshot function captures the current screen content and saves it to a file that can be displayed later. More information regarding screenshots can be found in sections Screenshots panel and Screenshots.
With the button Exit the remote access window is closed.
Power on, restart and shutdown computers
The features Power on, Reboot and Power down are helpful both for administrative purposes and for the preparation and follow-up of courses and exams. Using these functions, you can remotely power on, restart, or shut down computers. The corresponding buttons can be found in the toolbar:
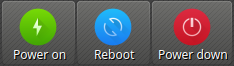
Click the appropriate button to power on, restart, or shut down all displayed computers. If you want to use a feature for individual computers only, you can select the respective computers and select the desired item in the context menu.
Veyon 4.2 and newer provide additional power down options. These options can be selected from a menu which opens when clicking the Power down button:
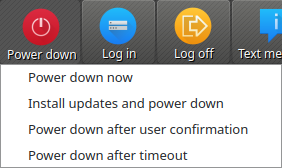
The following actions are available:
- Power down now
The computers will be powered down immediately without further confirmation dialogs.
- Install updates and power down
If supported by the operating system all available system updates will be installed during the shut down process. If no updates are available the respective computer will be powered down immediately.
- Power down after user confirmation
With this option each logged on user will be asked whether to shut down the respective computer. If no user is logged on a particular computer, it will be powered down immediately.
- Power down after timeout
Selecting this option opens a dialog window where you can set a time after which the computers will be powered down:
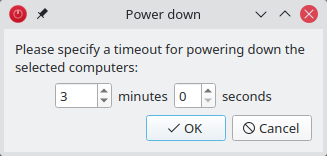
After accepting the dialog a countdown window is displayed on all computers telling the users to save their work and close all applications.
Attention
Please note that, depending on the program configuration, the computers will be restarted or shut down without further confirmation dialogs. Therefore, always make sure that the logged in users have saved all open documents etc. and closed all programs if possible. This prevents unwanted data loss.
Note
Depending on the configuration of the network and the system settings of the individual computers, powering on only works under certain technical conditions. At the same time, there is no access permission check when you power on, so you may be able to power on computers in other rooms or locations. For this reason, pay attention to the selected computers when using this feature.
Log in users
The Log in feature allows logging in a particular user on all computers remotely. A corresponding button in the toolbar is available for this purpose:

After pressing the button, a dialog window opens in which you can enter the username and password to log in:
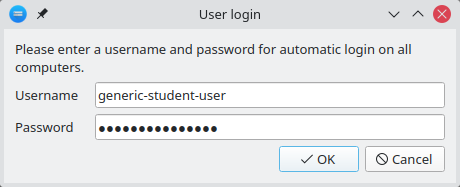
Click on OK to log in the specified user.
If you want to use this feature for individual computers only, you can select the respective computers and select the desired item in the context menu.
Note
This feature is only activated on computers on which no user is logged in. To ensure a consistent state on all computers consider using the Log off users feature beforehand.
Hint
A typical use case for this feature can be to prepare a course by logging in all computers and start programs or open websites in advance.
Log off users
The Log off feature complements the possibilities described in the previous section to control basic computer states. A corresponding button in the toolbar is available for this purpose:

Activate this button to log off all users from all displayed computers. If you want to use this feature for individual computers only, you can select the respective computers and select the desired item in the context menu.
Hint
A typical use case for this feature can be to end a course for all participants at the same time.
Attention
Please note that the logged on users – depending on the program configuration – are logged off without further confirmation dialogs. Therefore, always make sure that the logged on users have saved all open documents etc. and closed all programs if possible. This prevents unwanted data loss.
Send text message
Another possibility for user interaction is to send a text message to individual or all course participants. The text message is displayed on the computers in the form of a message window. The Text message button is available for this purpose:

After pressing the button, a dialog window opens in which you can enter the message to be displayed:
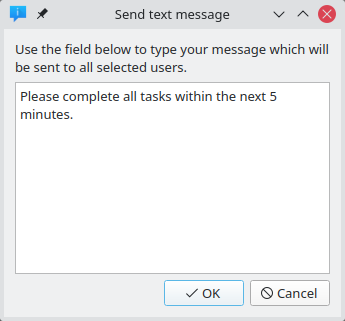
Click on OK to send the entered message.
If you want to use this feature for individual computers only, you can select the respective computers and select the desired item in the context menu.
Run program
If a specific program is to be started on all computers, you can use the Run program feature in the toolbar. For this purpose, click on the button shown:

Depending on whether you added custom programs before or programs have been predefined by the administrator, a popup menu or a dialog window opens. In the former case all available programs are listed in the menu:
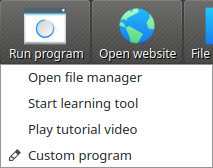
Click the desired item to start the respective program on all computers. Alternatively click the last item Custom program to run a program that is not listed. This will open a new dialog window. In this dialog you can enter the name of the program to run:
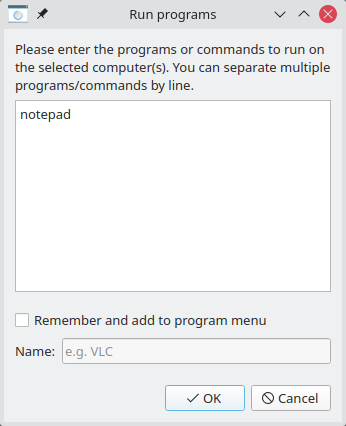
Confirm this dialog with OK to run the program. Please note, that a program often is not located in the program path environment so that you have to specify the complete path to the program, e.g. "C:\Program Files\VideoLAN\VLC\vlc.exe".
Note
To remove a previously added custom program, move the mouse over the according item and press the Del key.
Hint
You can pass an argument to most programs with the name of a file that you want it to open automatically. For example, if you want to play a video on all computers, add the path to the video file separated by a space, e.g. "C:\Program Files\VideoLAN\VLC\vlc.exe" X:\Videos\Example.mp4.
Attention
In case the program path or file name contains spaces, you always have to enclose the complete path and file name in quotation marks. Otherwise parts of the input will be interpreted as parameters. Example: "C:\Program Files\LibreOffice 5\program\swriter.exe".
Open website
If you want all students to open a specific website, you can automatically let that website open on all computers. Use the Open website button to do so:

Depending on whether you added custom websites before or websites have been predefined by the administrator, a popup menu or a dialog window opens. In the former case all available websites are listed in the menu:
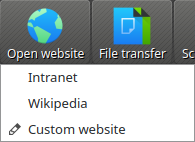
Click the desired item to open the respective website on all computers. Alternatively click the last item Custom website to open a website that is not listed. This will open a new dialog window. In this dialog you can enter the address of the website to open:
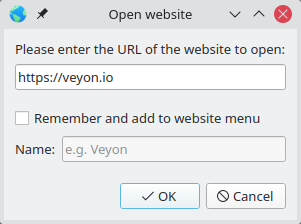
Confirm this dialog with OK to open the website.
Note
To remove a previously added custom website, move the mouse over the according item and press the Del key.
File transfer
Using the file transfer feature you can easily transfer files to all students and optionally open the transferred files afterwards. First click the File transfer button to open a file dialog which allows you to select the files to transfer:

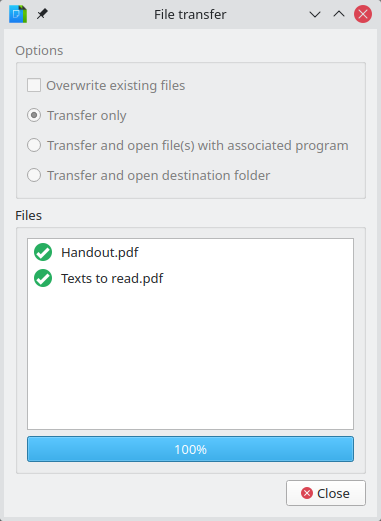
After selecting the desired files the actual file transfer dialog opens:
In this dialog further options can be chosen before starting the file transfer. Per default the files only will be transferred to the user’s home or profile directory without overwriting existing files.
- Overwrite existing files
Enable this option to overwrite possibly existing files. This can be useful to replace an old version of a file or document with a new one.
- Transfer only
In this mode, only files are transferred without further actions being performed. Use this mode to silently distribute teaching material in advance without disturbing the students.
- Transfer and open file(s) with associated program
In this mode, the transferred files will be opened with the corresponding program which is associated with the respective file type. For example, text documents will be opened with the installed word processor program. Use this mode to make students work with the provided materials immediately.
- Transfer and open destination folder
If you intend to transfer many files at once, opening all of them automatically is not a good choice in most cases. Instead, the destination folder can be opened in a file manager window where students can view the transferred files and open the desired ones themselves.
After choosing the desired options click the Start button to start the file transfer. Depending on the size of the files and the number of computers this may take a while. A progress bar with the total progress is shown at the bottom of the dialog. After the transfers have been completed, you can click the Close button to finish:
Screenshot
Veyon allows you to save the current screen content of single or all computers in image files. By clicking the button Screenshot you trigger the feature for all displayed computers:

If you want to use this feature for individual computers only, you can select the respective computers and select the item Screenshot from the context menu.
You will then receive an information message about how many screenshots have been taken. You can now view the images in the screenshots panel and delete them if necessary.